
Having a dedicated and secure lab environment is essential in malware analysis. A proper lab allows you to investigate suspicious files, monitor their behaviour, and develop defense strategies – all without risking your production systems or personal data.
There are multiple ways you can set up your Virtual Machine e.g. ready appliances like Flare-VM pre-built ISO but they often need manual updating and you really need to trust the source. To have the most control over your environment I decided to do everything myself – from OS installation to setting up the tools. Here I will show you the process of creating Windows 11-based virtual environment ready to perform both static and dynamic malware analysis.
Installing Windows 11 OS
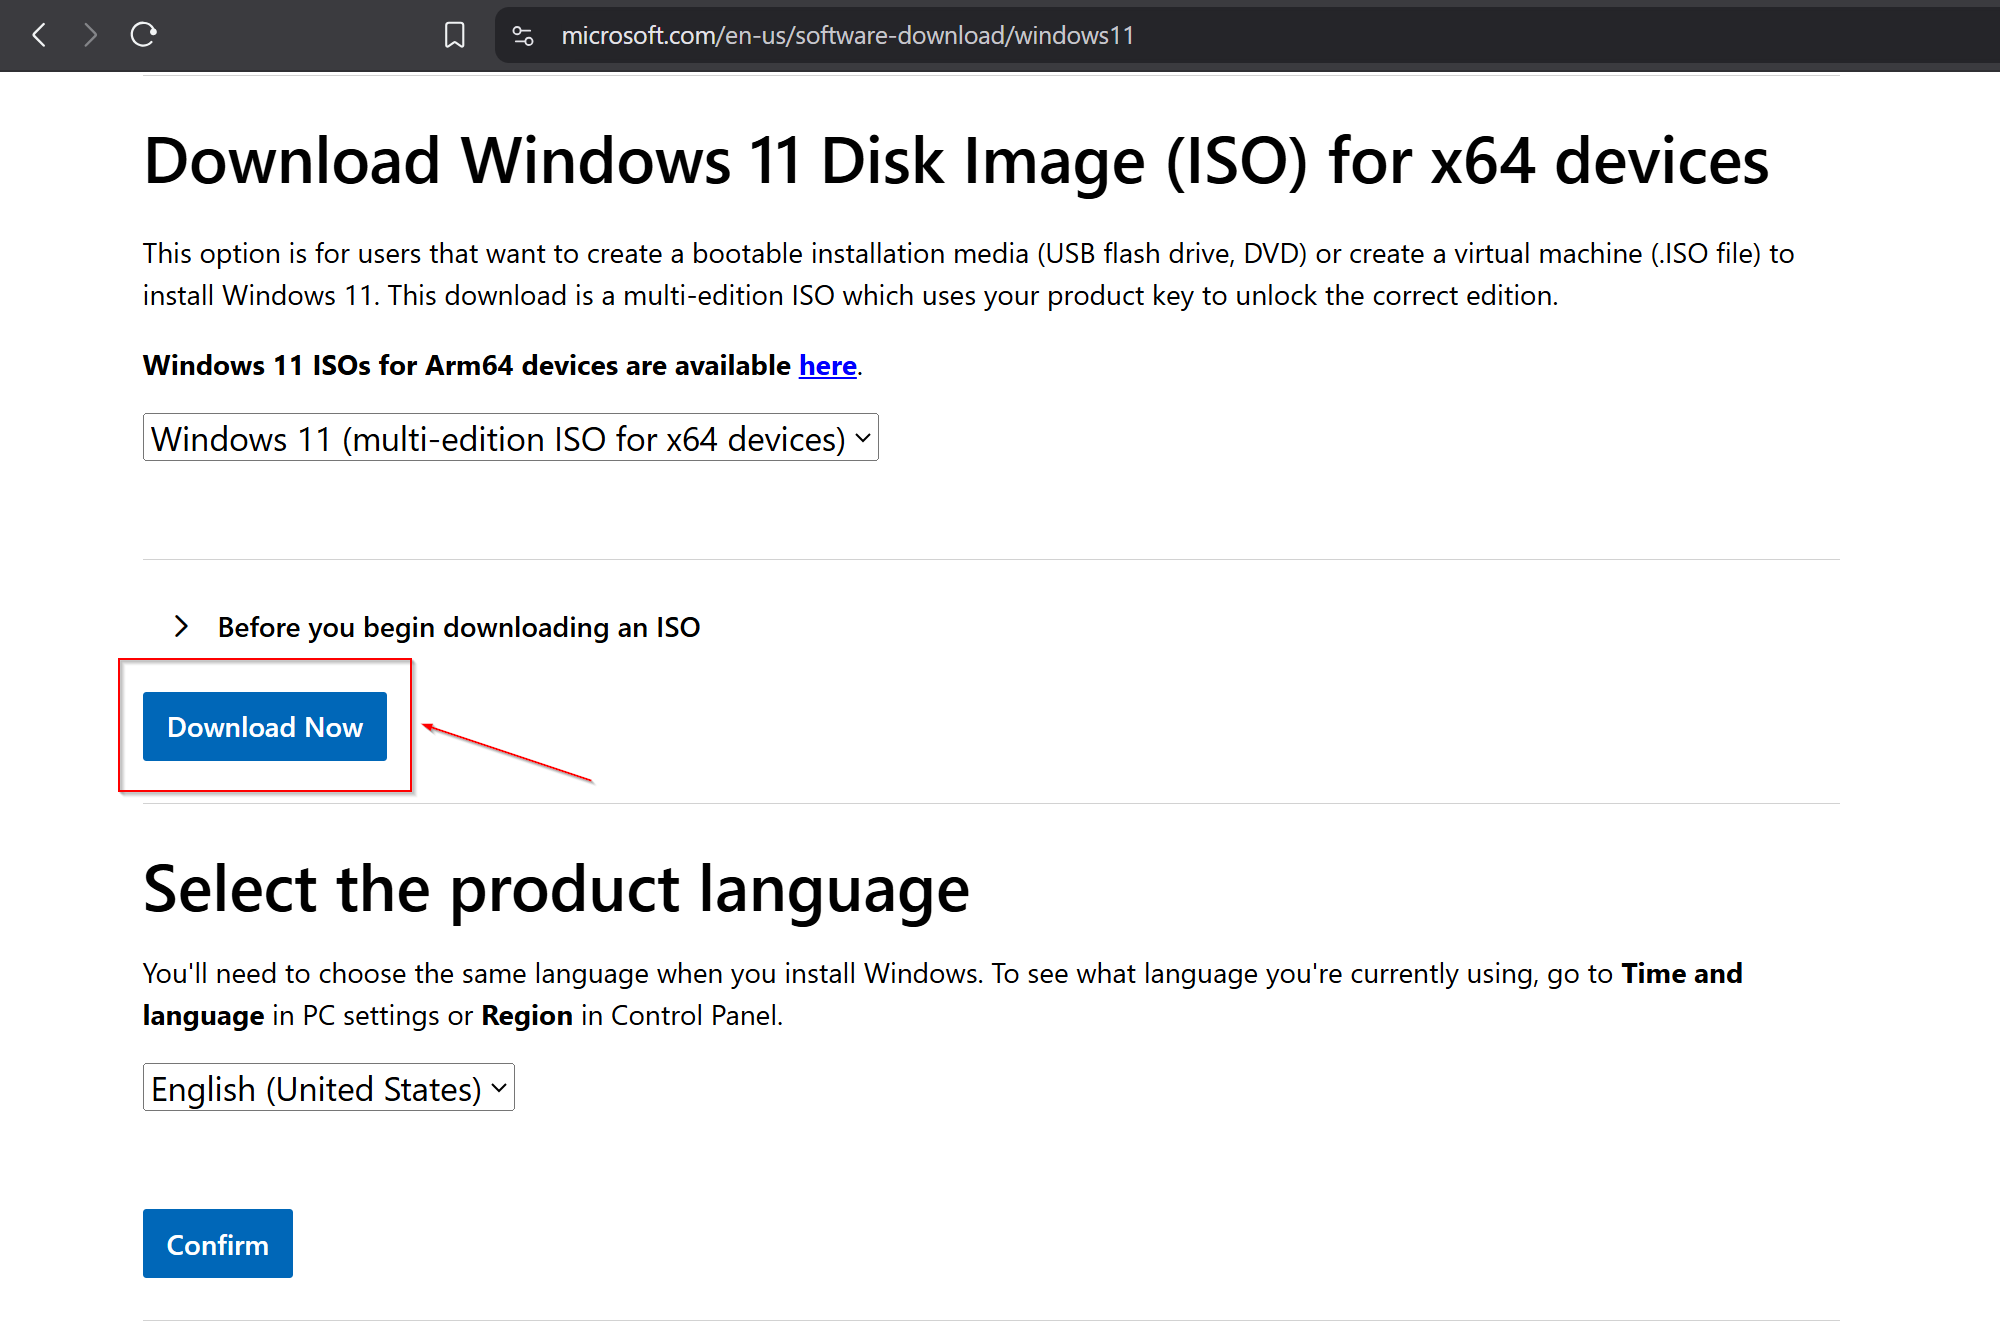
The first step is to download Windows (ex. 1). I’ve decided to use the latest Windows 11 release due to the fact that this is what most of personal computers use these days. For creating VM choose the ISO disk image option.
The next step is to download the hypervisor (ex. 2) that will virtualize the OS. I chose Oracle VirtualBox. Since my host machine is also Windows, I selected the appropriate installer from the VirtualBox site.
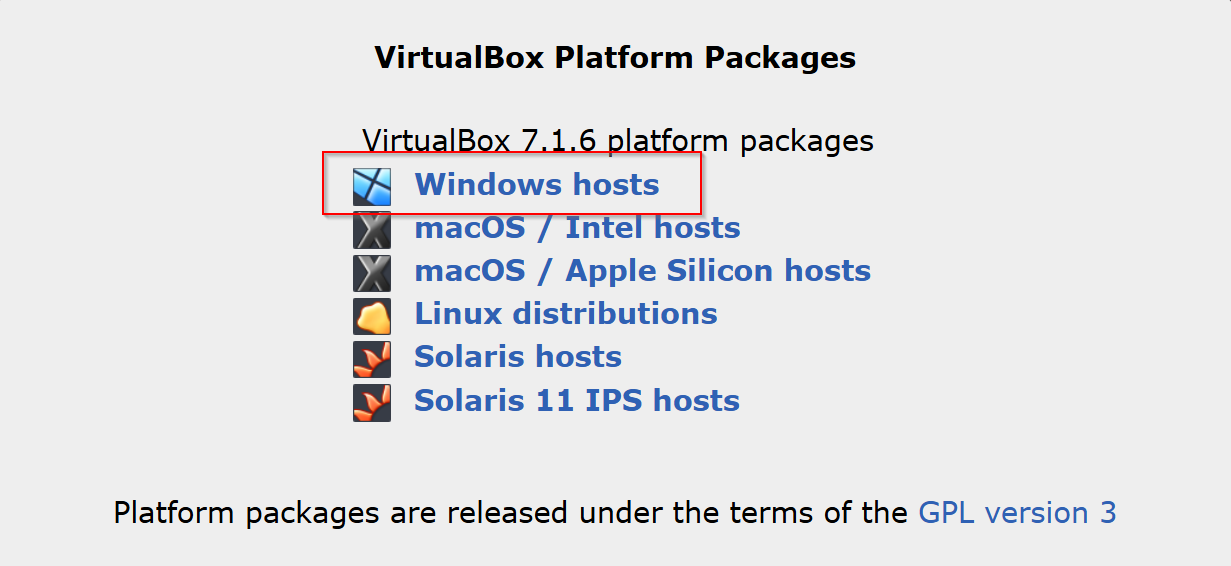
For Windows, you will be downloading a .exe file with a straight-forward installation procedure.
After installing and opening VirtualBox, you will see a greeting window. As we already downloaded the ISO file – go ahead and use „New” button to create a new VM instance (ex. 3).
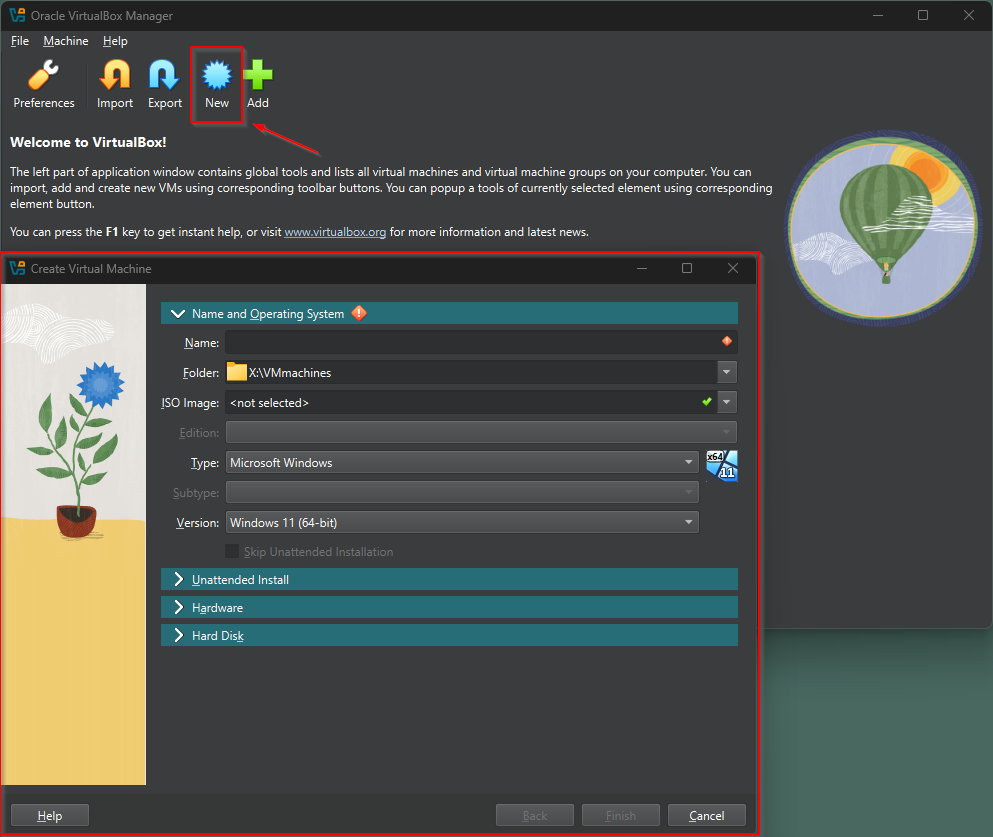
Create a name for the VM and choose the Windows 11 ISO file. Most of the fields will be filled for you and there is no need to change them. For the folder, choose a disk partition where you have the most memory as the files can get quite large later on.
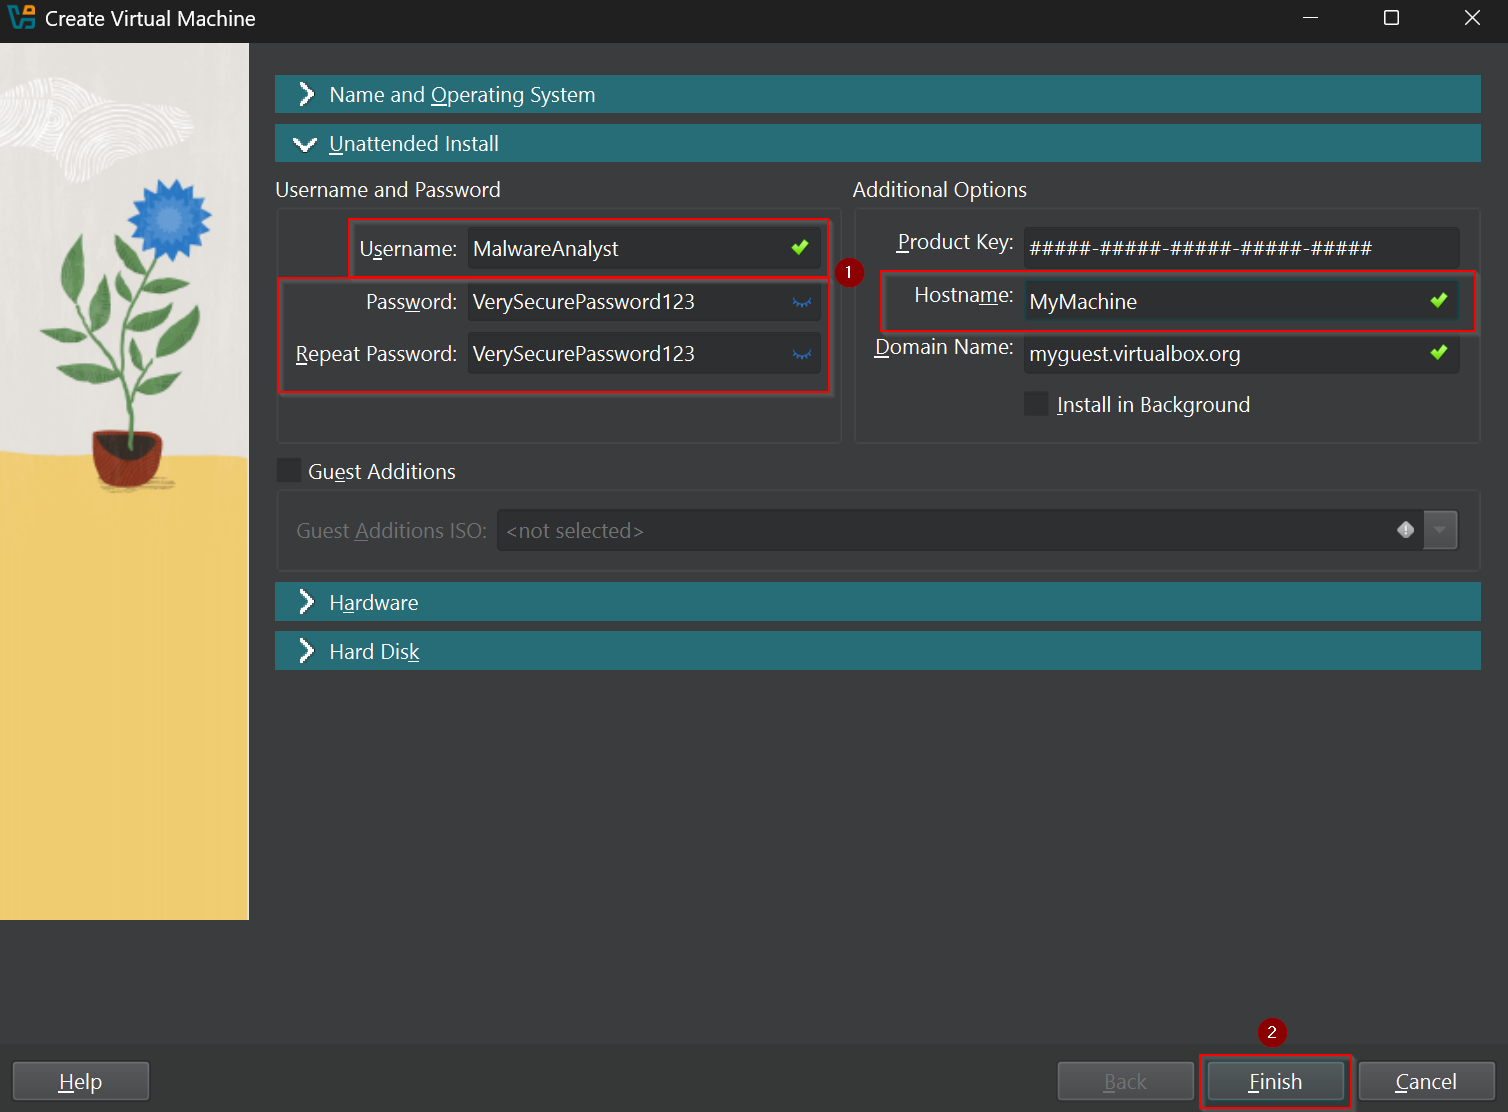
In the Unattended Install section (ex. 4) create the hostname, username and a secure password. Confirm with the Finish button.
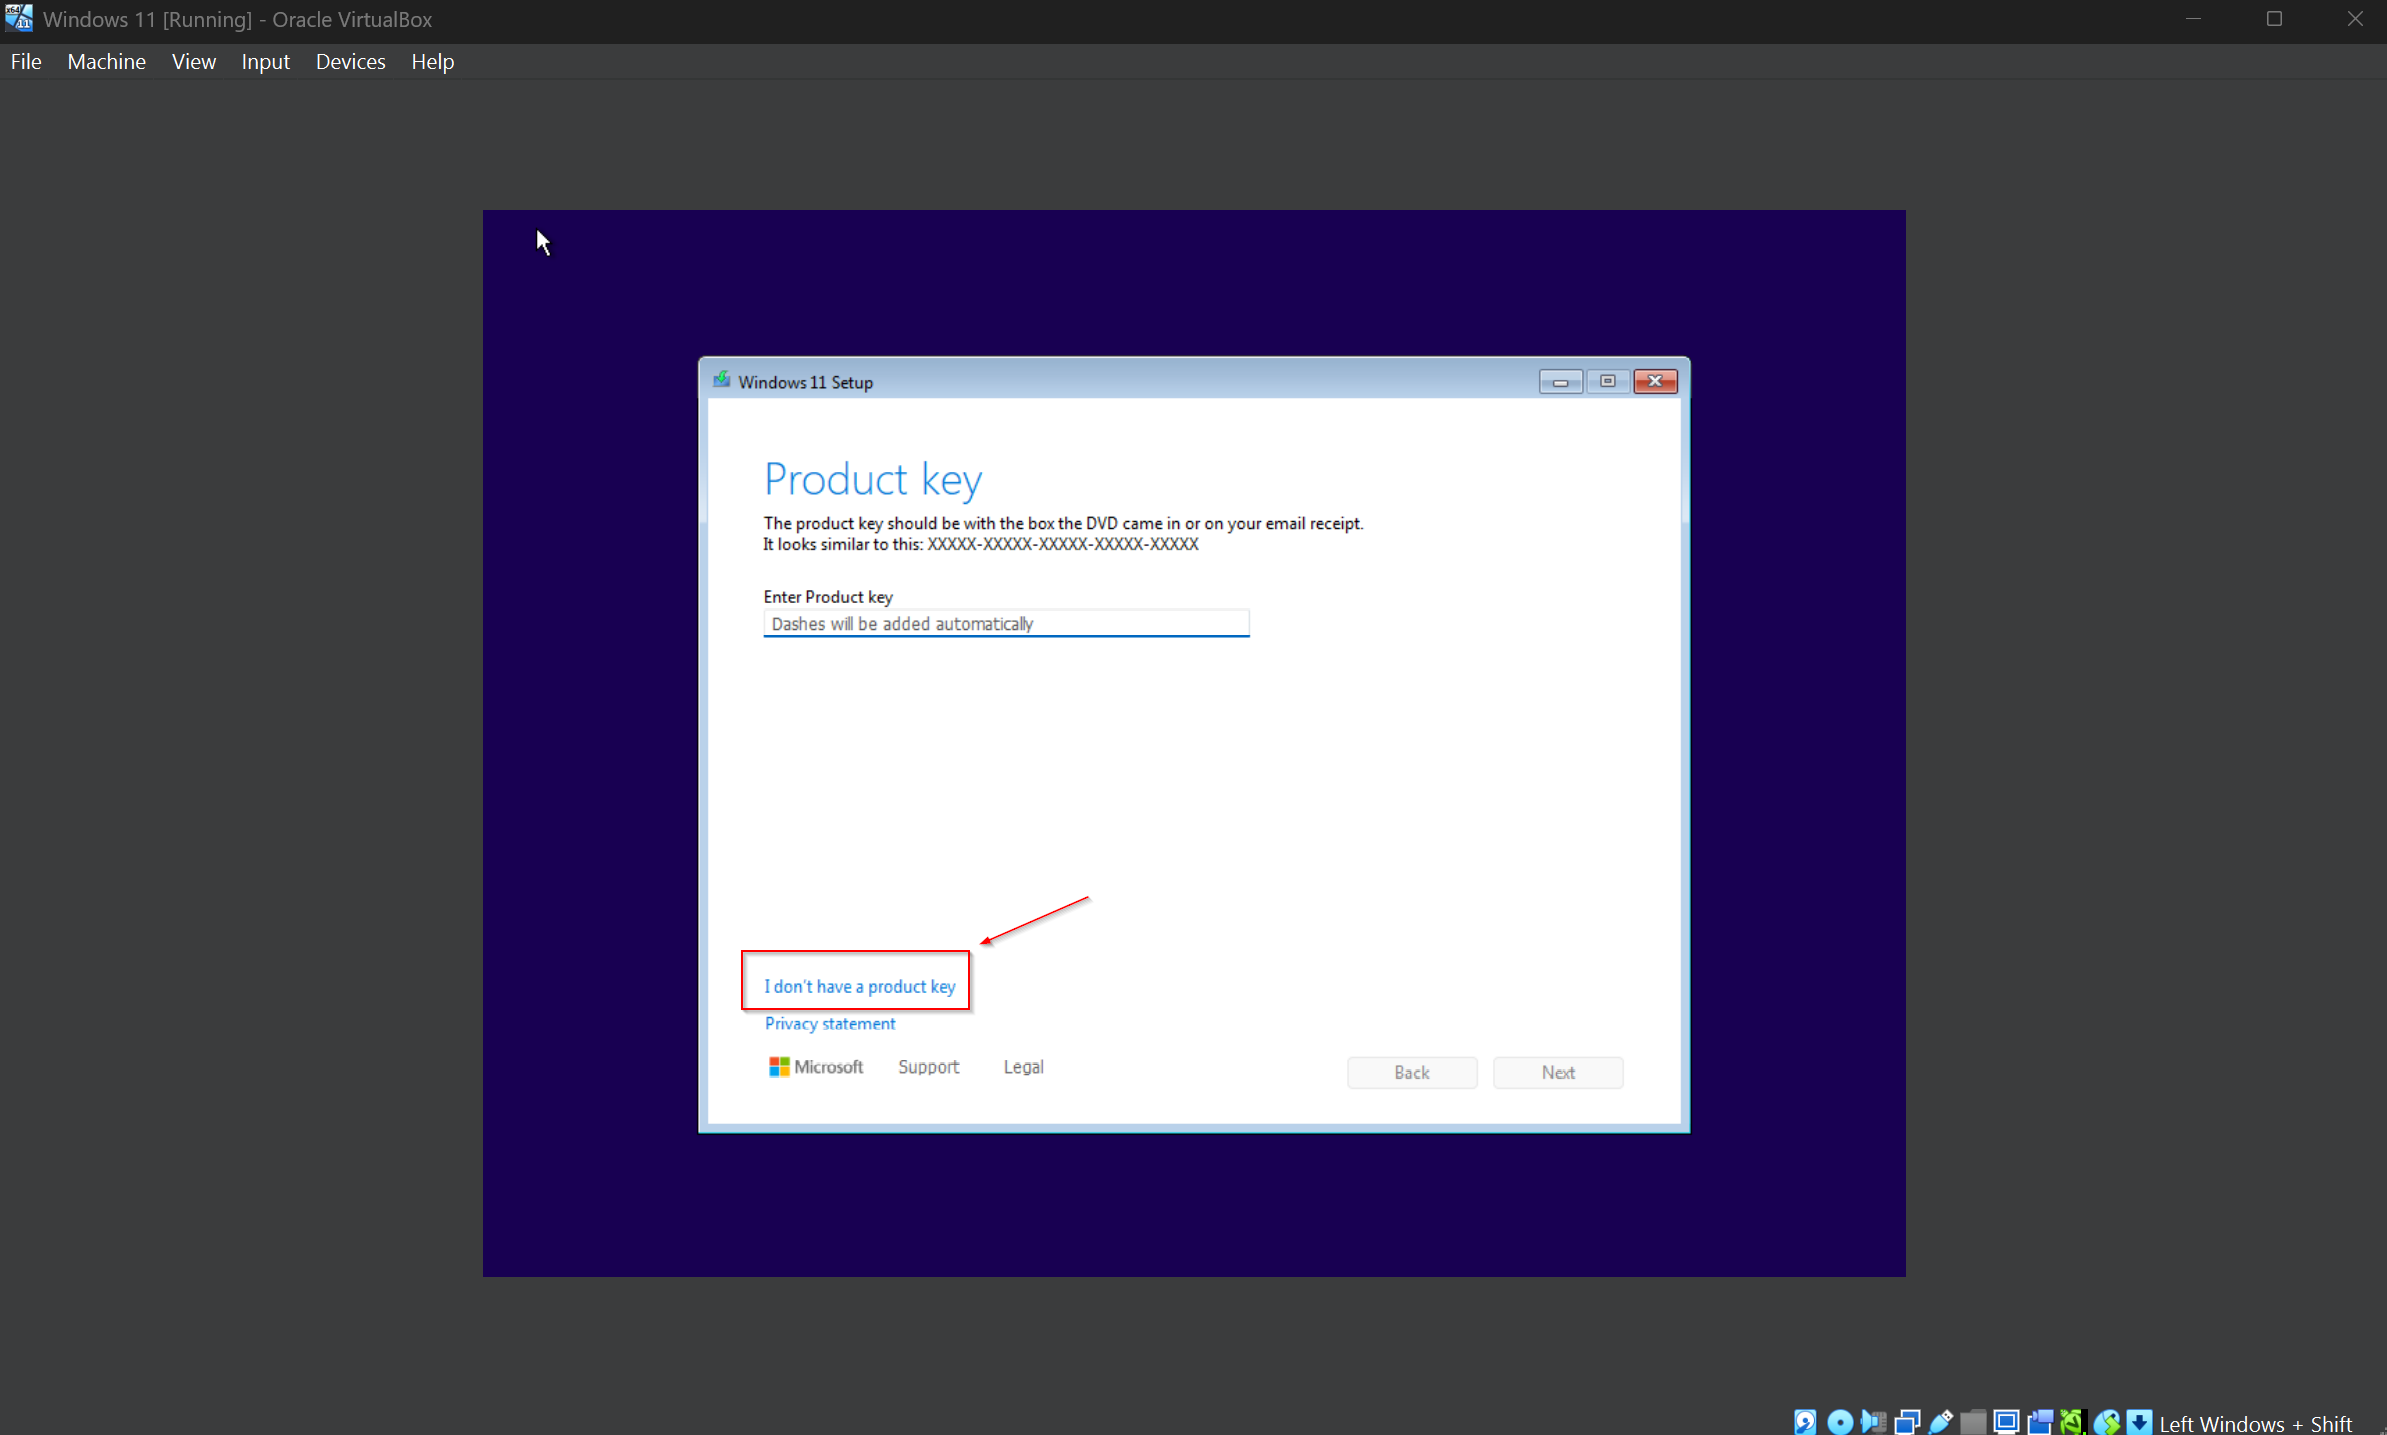
The VM should to boot up on its own. Press any key to begin booting from the ISO image and when „Windows 11 Setup” window appears perform clean Windows installation without the product key, as shown below (ex. 5).
The system will install itself without any interaction. After a reboot it should also log onto your account – now we are ready for the next steps.
Initial Setup & Configuration
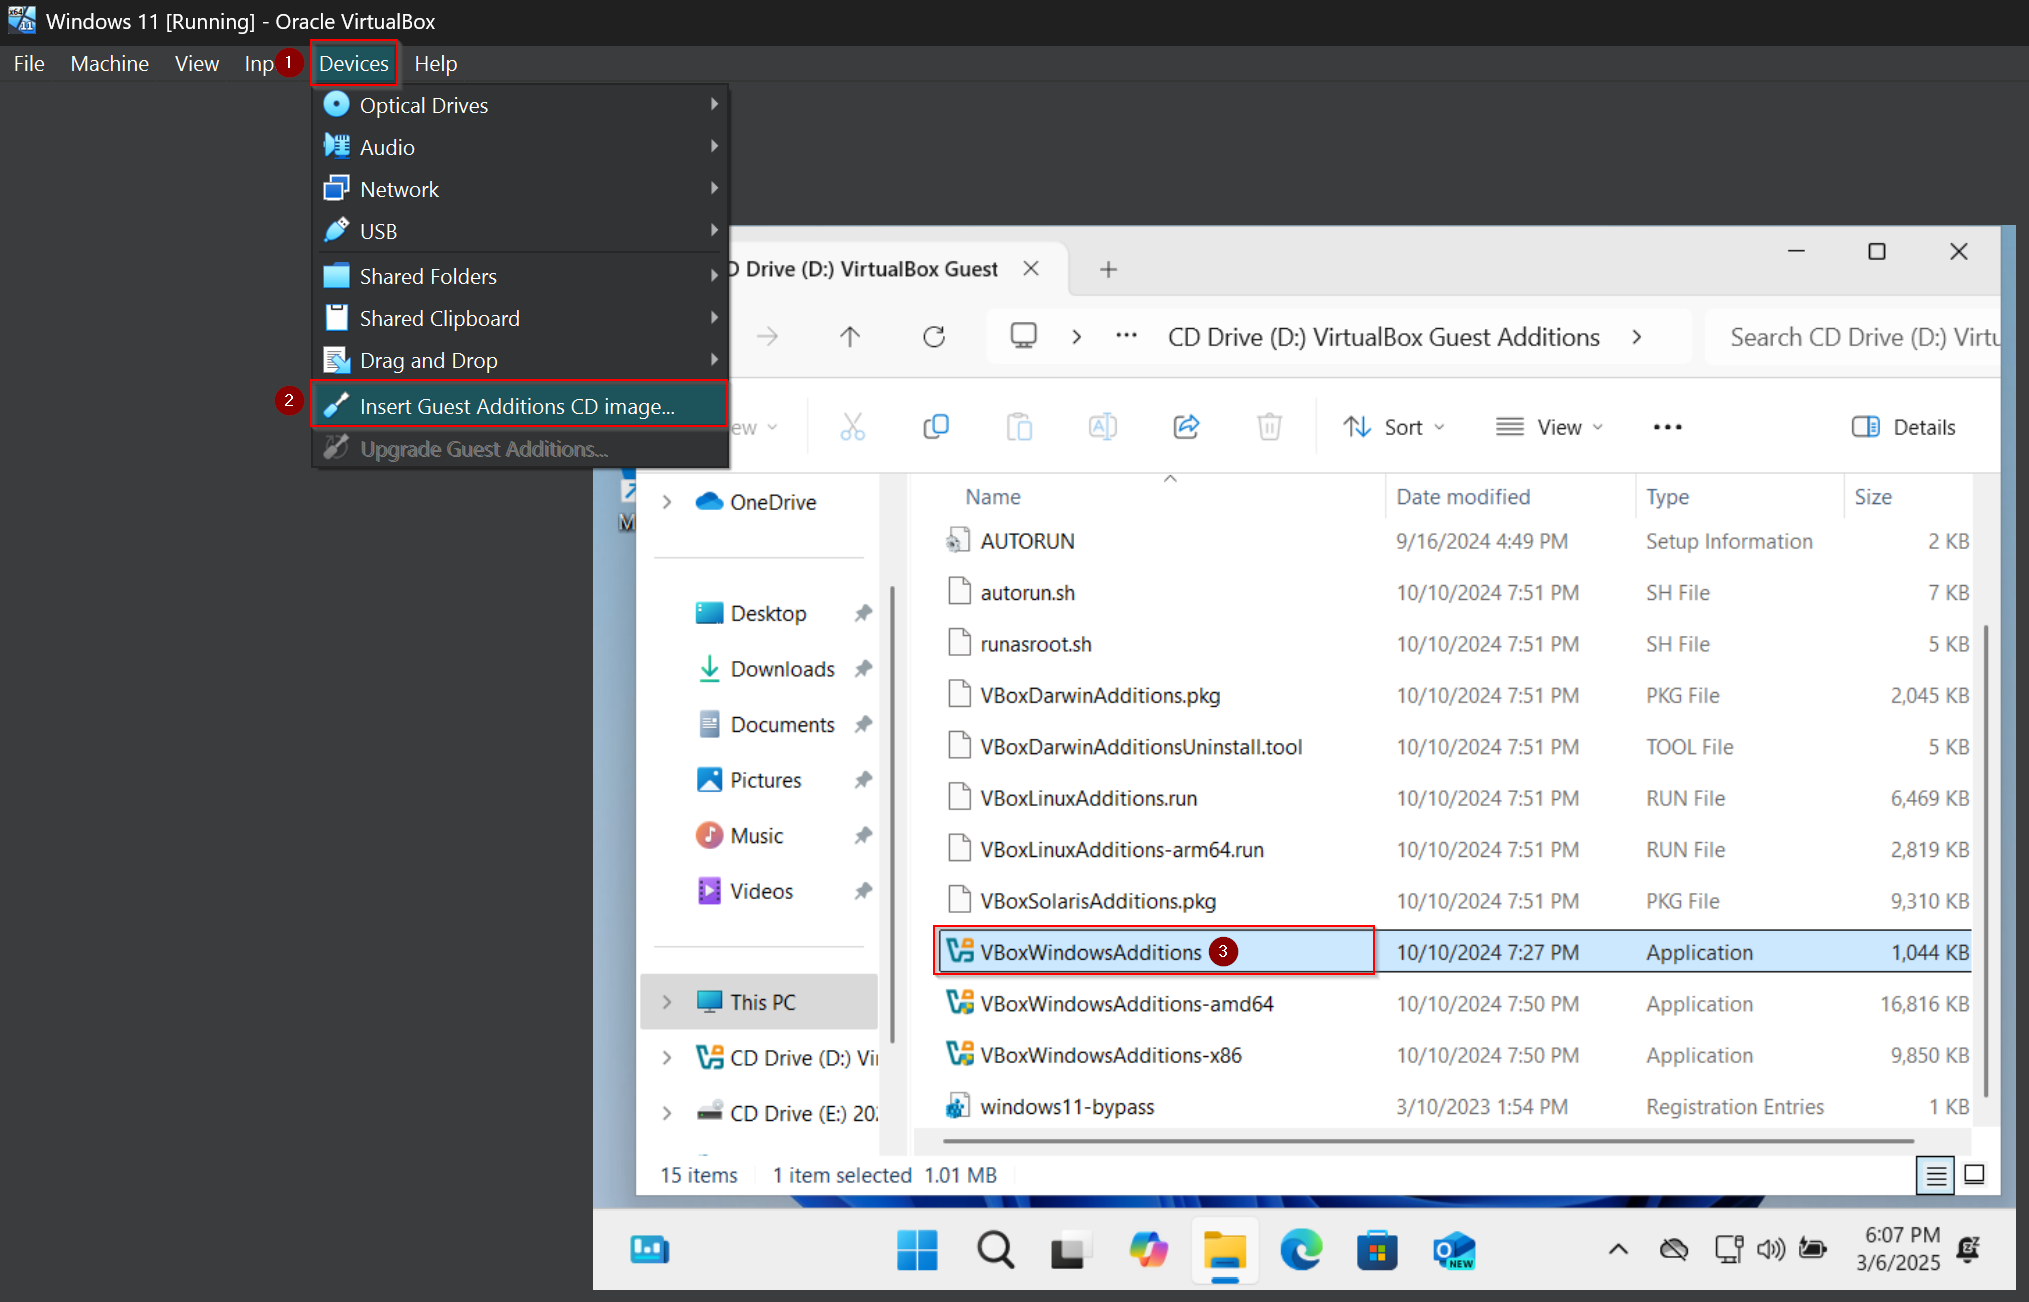
For usability and performance reasons, let’s install „Guest Additions” – you can insert it under „Devices” > „Insert Guest Addtions CD image…„, next open the inserted drive and install VBoxWindowsAdditions (ex. 6).
Additionally I delete all the bloatware that Windows usually comes with to keep things clean – this way logs are much easier to go through. I also install a browser of my choice.
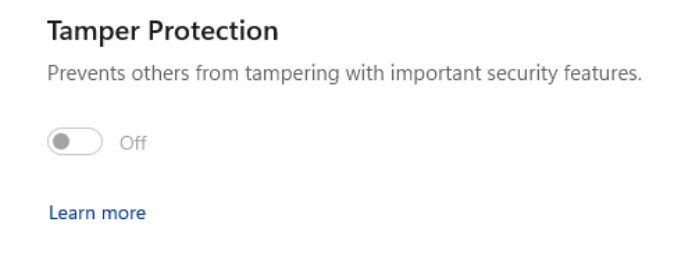
The next step is to disable Windows Defender real-time protection – this step is crucial because otherwise it will delete or quarantine your malware samples and also it sometimes flags tools as potencial malware.
Enter the Windows Defender settings – under „Virus & threat protection” you should disable Tamper Protection (ex. 7).
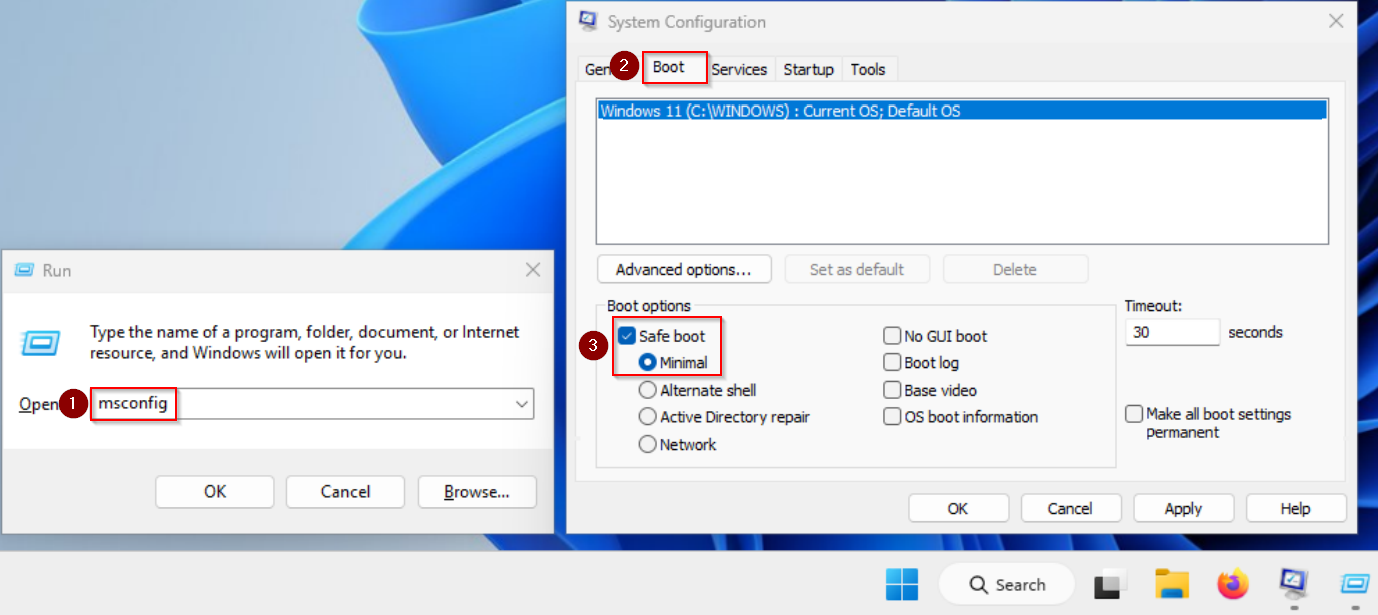
In order to permanently kill Defender, boot up Windows in the safe mode. This can be done by running msconfig, navigating to the „Boot” tab, and enabling „Safe Boot„.
After rebooting, your machine should be already in the safe mode.
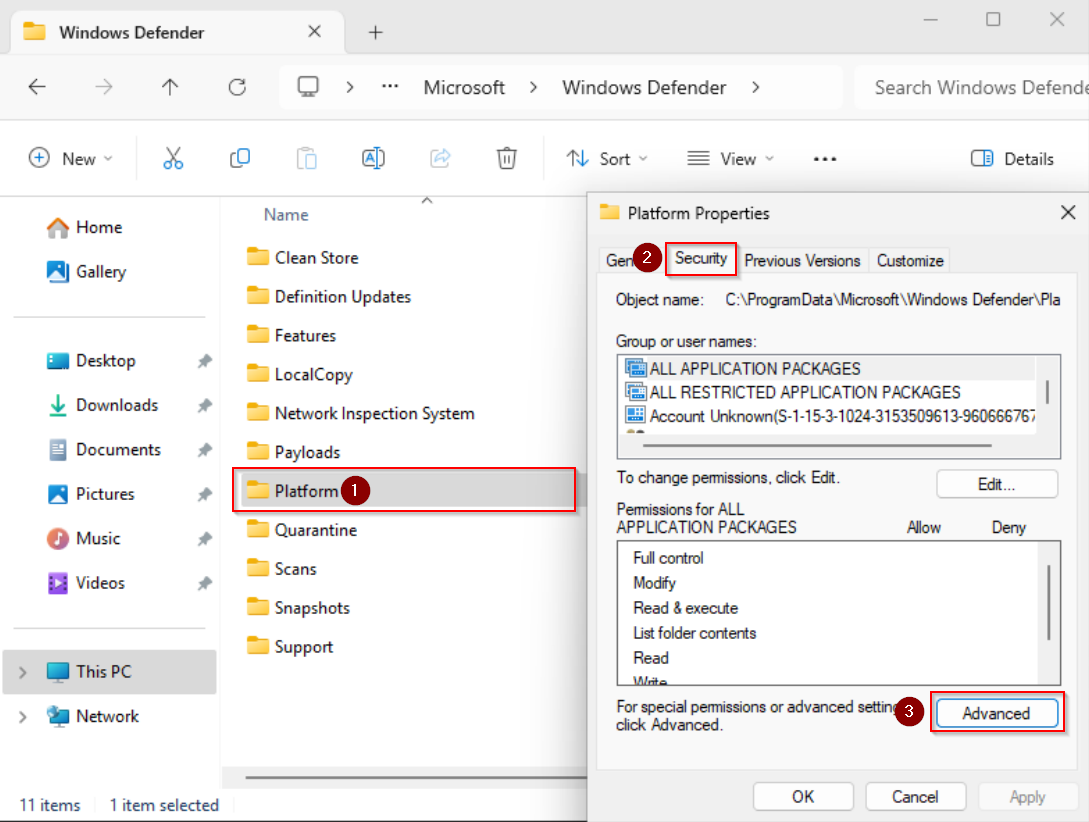
Open up File Explorer and navigate to „C:\ProgramData\Microsoft\Windows Defender”. You will see a folder called „Platform” – right click it and enter it’s properties. Under security tab press „Advanced” (ex. 9).
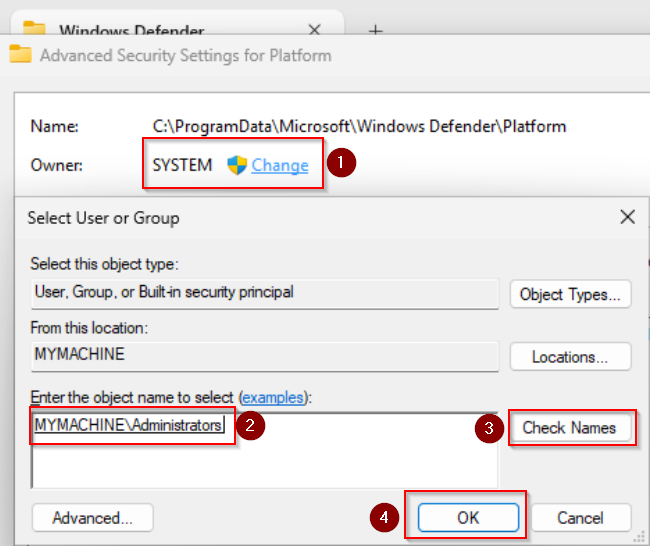
In the top left corner press on „Change” and add your Administrators group (ex. 10). After pressing „Check Names” it should find it. Press OK.
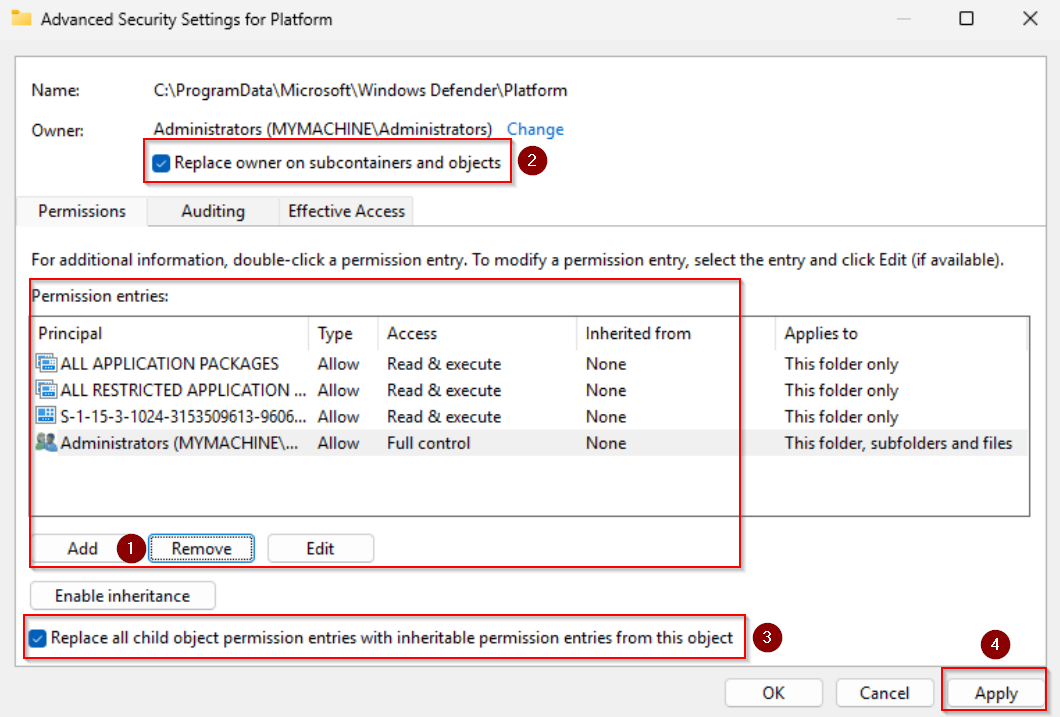
Remove all other user groups (except Administrators) from the permission entries eg. „Users„, „TrustedInstaller” and „SYSTEM„. Check the two boxes shown below (ex. 11) and apply the changes.
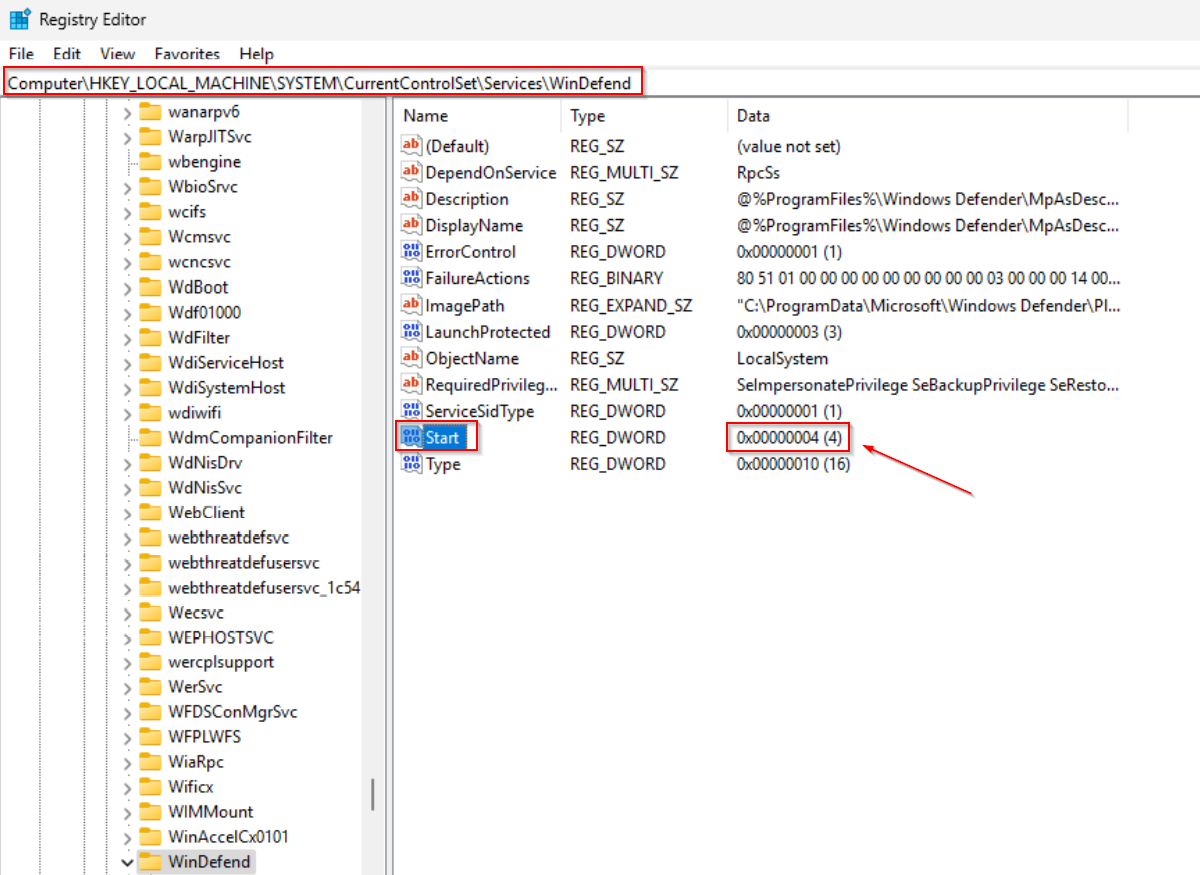
Permissions set. Now open up registry editor (regedit) and navigate to the following paths. Change the „Start” value in each of them to „4” (ex. 12).
Finally, open msconfig, turn off safe boot and restart the VM. The Defender should no longer intervene when storing or running malicious files.
Now that there is no bloatware and the Windows Defender is killed – it’s time to install essential tools.
Essential Tools & Software
7-zip
First sofware I install is 7-zip. Why? Many times I’ve run into issues while using file explorer for unpacking compressed archives – I like to avoid that.
Here’s the official 7-zip website: https://www.7-zip.org/download.html
Sysinternals Suite
The core toolset for malware analysis is Sysinternals Suite. It is available on official microsoft website (ex. 13):
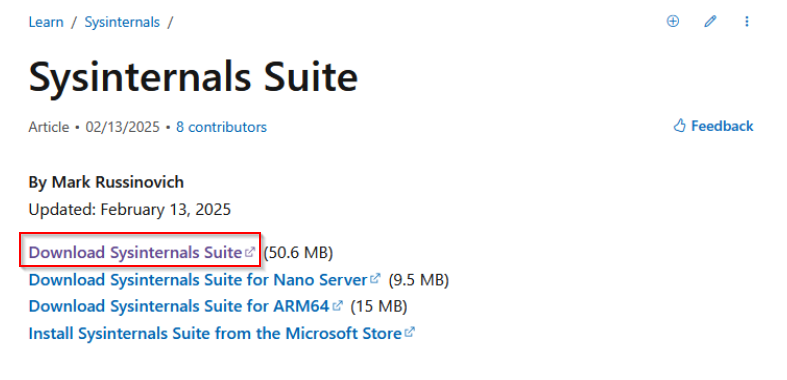
The most popular malware analysis tools from this pack are:
Regshot
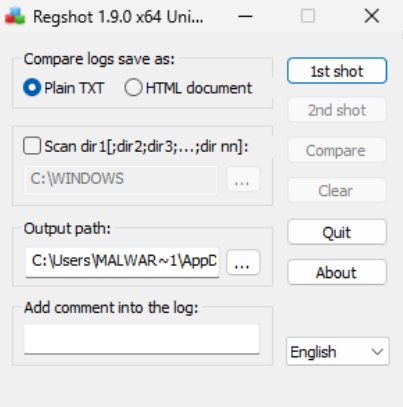
Regshot enables you to take 2 shots (state captures) of registry and compare them. This way you will end up with only the differences. I use it during almost every dynamic analysis.
Regshot can be downloaded from SourceForge, here: https://sourceforge.net/projects/regshot/
FakeNet-NG

More often than not you want to keep the operational security and perform analysis on an air-gapped system – nowadays malware is able to detect if it is being analysed in such conditions so it is important to at least simulate network responses. That’s why my next recommendation is to use FakeNet-NG – it is really easy to use and modify (eg. If you want custom resposes).
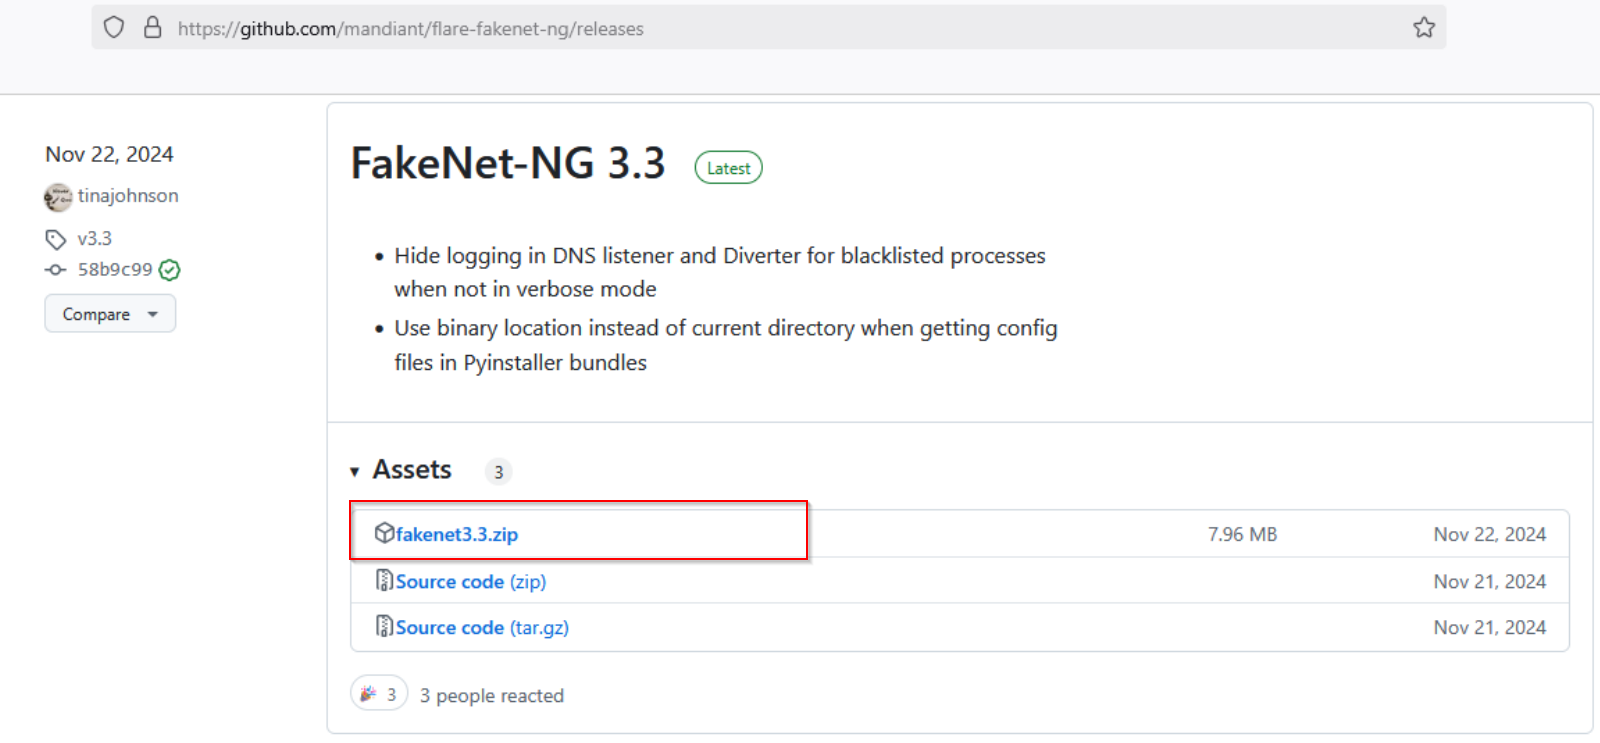
You can download FakeNet-NG as a zip archive from the official github page (ex. 16):
https://github.com/mandiant/flare-fakenet-ng/releases
Wireshark
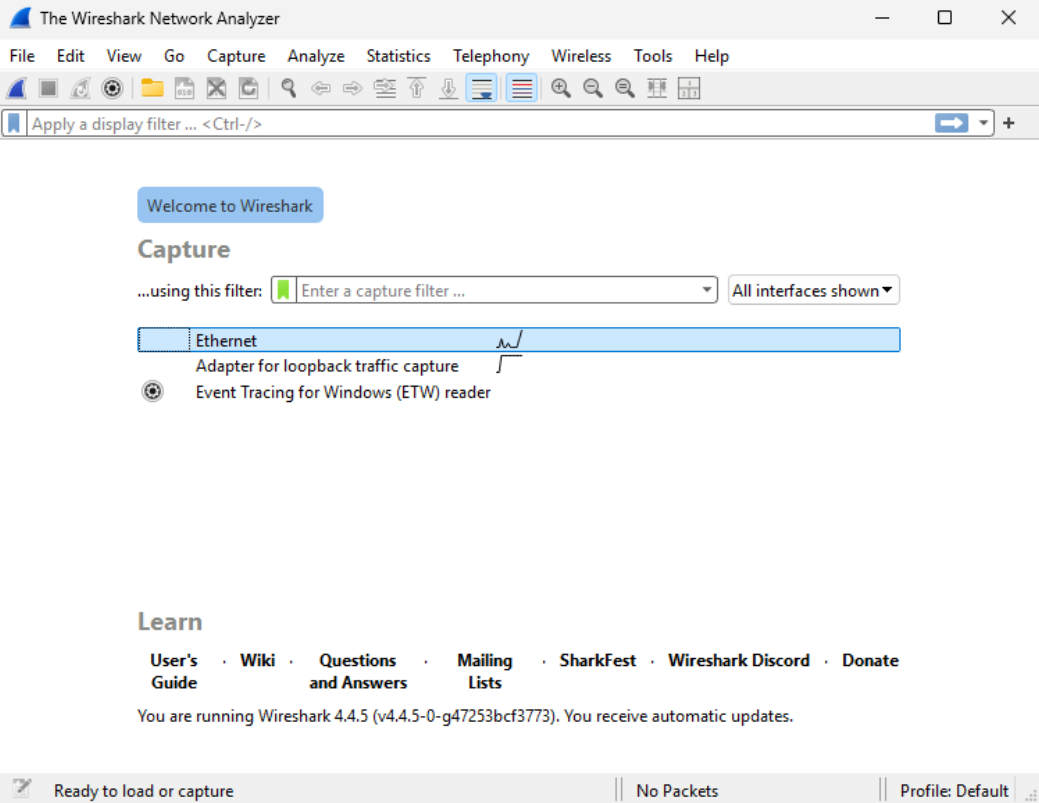
In order to perform deeper analysis of the network traffic or open .pcap log files I use wireshark. You can find it on the official wireshark download website: https://www.wireshark.org/download.html
Ghidra

Ghidra is a popular tool for reverse engineering created by the NSA. It can decompile binary files which helps to determine how a malware (or any other software) works under the hood. Capabilities include disassembly, assembly, decompilation, graphing, and scripting, along with hundreds of other features.
To use Ghidra you first need to install Java JDK – you can get it in the form of .msi installer here: https://adoptium.net/temurin/releases/
Next download and uzip Ghidra itself: https://github.com/NationalSecurityAgency/ghidra/releases
dnSpy
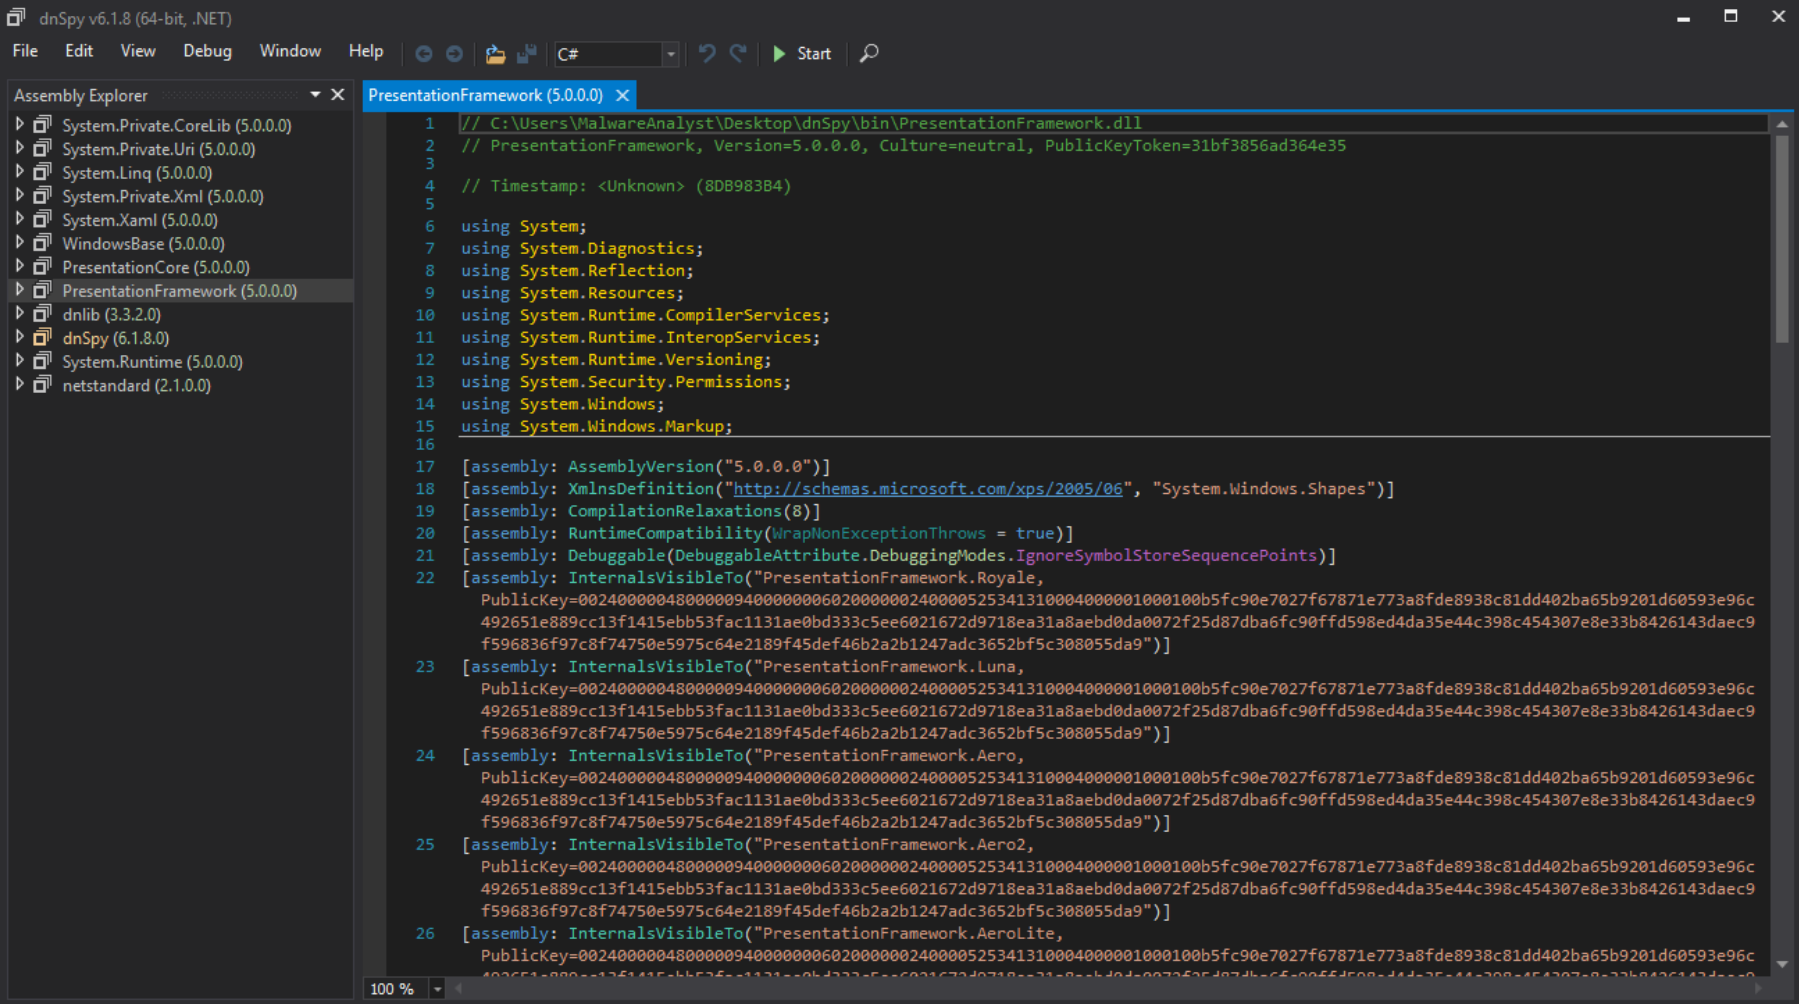
For a .NET based malware I am using dnSpy. You can use it to edit and debug assemblies even if you don’t have any source code available.
dnSpy is available on the creator’s github page: https://github.com/dnSpy/dnSpy/releases
x64dbg
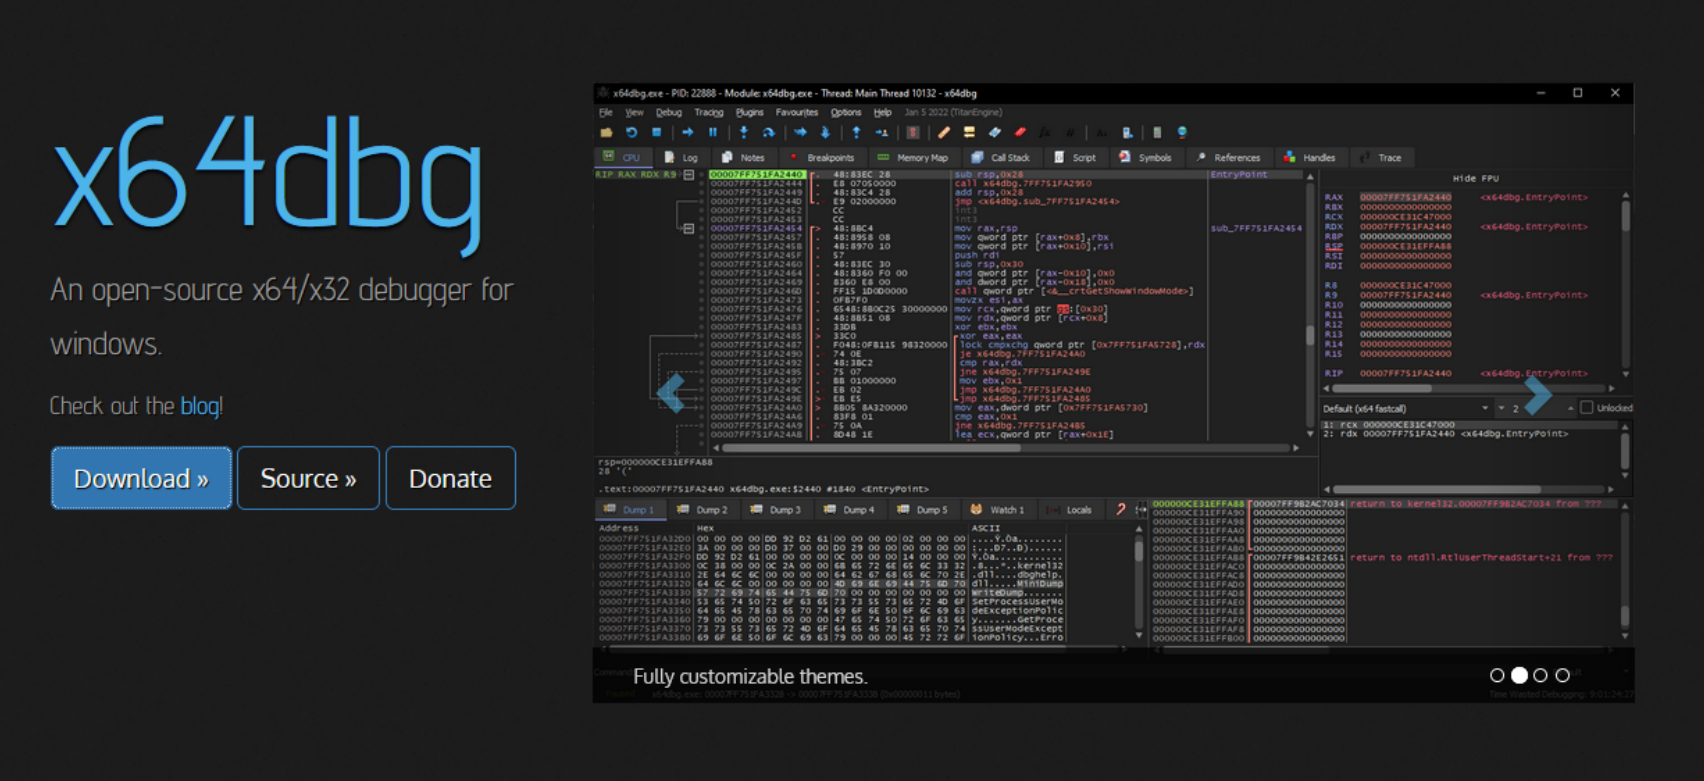
x64dbg is an open-source debugger for Windows. It has many uses e.g. reverse-engineering binaries, test software vulnerabilities and even modify instructions in memory to test how the application behaves. For 32 bit application the equivalent is x32dbg.
You can get x64dbg here: https://sourceforge.net/projects/x64dbg/files/snapshots/
These tools will be enough to keep you busy for a long time diving deep into malware analysis. The lab is almost ready! Before testing it on real malware we need to preserve it’s state and put measures to safeguard our host machine.
Snapshots: preserving system state
If you’ve made it this far, you’ve certainly invested time in setting up your lab. You don’t want to risk ruining it for just one malware sample! This is where snapshots really shine.
A snapshot in a virtual machine is a point-in-time backup of the VM’s state, including its disk, memory, and settings. When you take a snapshot, the VM saves its current condition, allowing you to revert back to that exact state later. Here is how to set-up and use snapshots on VirtualBox.
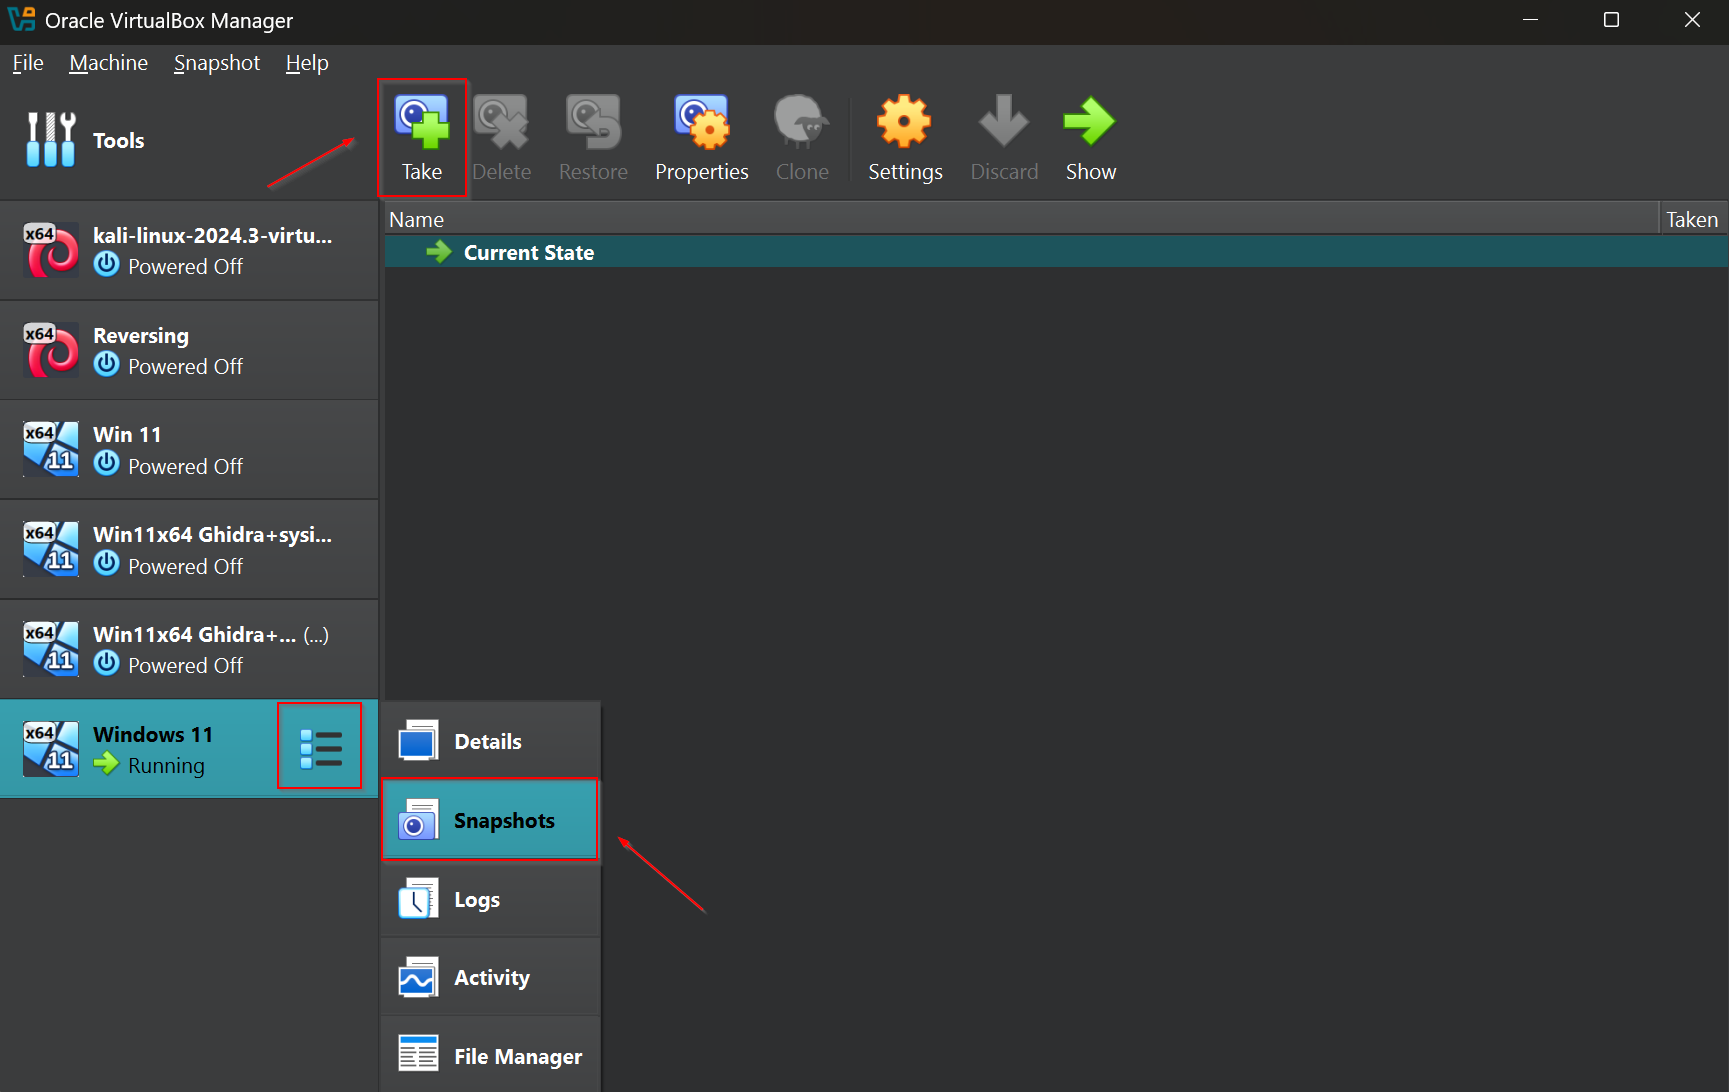
To take a snapshot of the VM you want to change the details view to snapshot like on the screenshot below (ex. 21). To create the backup just press on „Take” button.
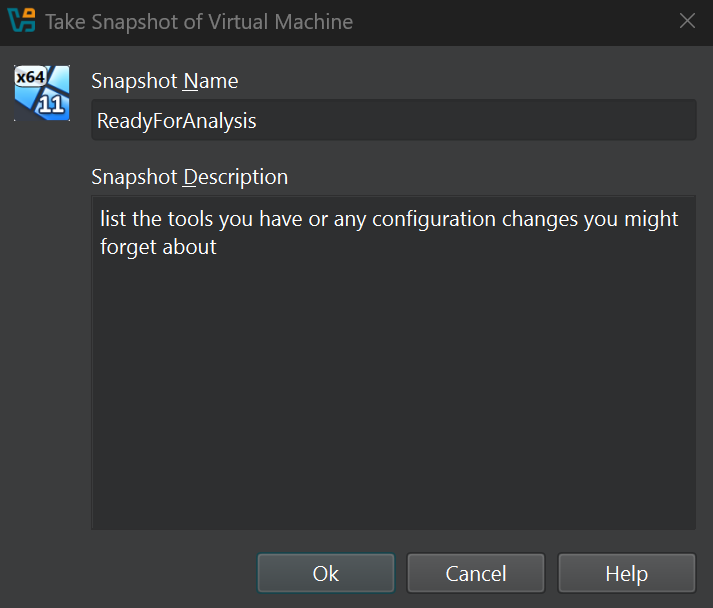
A window will appear (ex. 22). Choose a name for your snapshot, and since it’s easy to forget the details, it’s a good practice to add a description. Note any changes you’ve made, such as installed tools or specific configuration adjustments.
If you’d like to revert to the previous state, just press „Restore” button (ex. 23). Tip: you can also restore the machine when powering it off at the same time!

Configuring Network Isolation
Even though malware that is able to perform VM-escape is not that common – it can still happen! The obvious escape vector is network.
In order to protect yourself, you need to chose the right network mode for the right purpose. You can change between them under Network settings of your virtual machine (ex. 24).
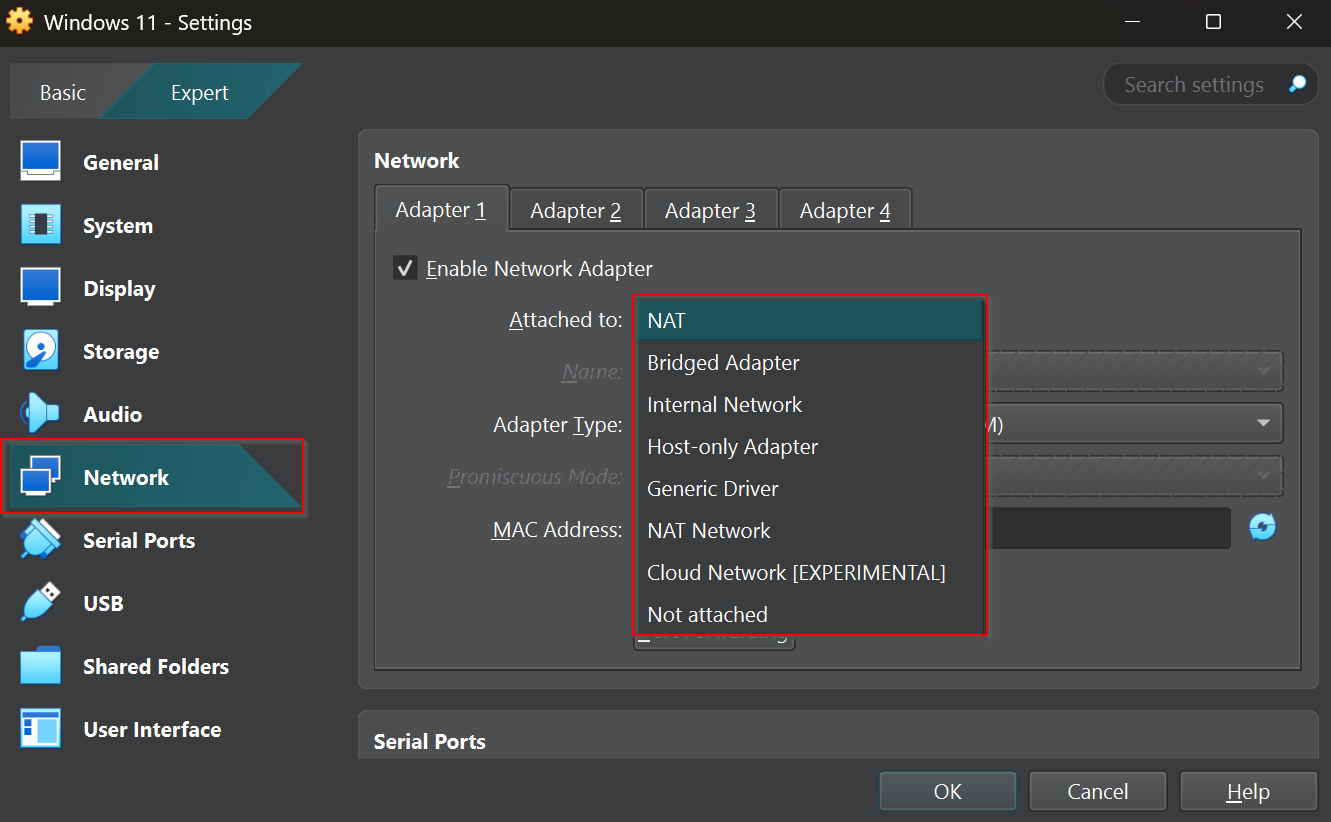
Below are examples of the modes that I use and the reasons why.
NAT (Network Address Translation)
When using NAT your Virtual Machine shares the host machine’s IP address and acts like another device behind a router.
When to use it: When you want to be able to reach the internet without any issues eg. Performing static analysis, OSINT or downloading tools/samples.
Bridged
The VM gets its own IP address on the same network as the host (like another device on the network). Bridged networking is usually not ideal for malware analysis due to the security risks involved.
When to use it: If you’d like to expose the machine to your local network. The VM can act as a server, receive incoming connections, and use DHCP from the router.
Internal Network (go-to for dynamic analysis)
The VM is isolated from the internet or the host machine. (can be configured to communicate with other virtual machines)
When to use it: If you want completely isolated malware analysis or testing environment. When you want to use FakeNet-NG this is usually the go-to option as it needs an active network adapter to work.
Not-Attached
„Not-Attached” option completely disables communication.
When to use it: Full Isolation for Maximum Security as it prevents malware from making any outbound connections.
Additional safeguard: ALWAYS remember to check if your network shares, clipboard and drag & drop settings are disabled before running any malware!
SUMMARY
Setting up a dedicated malware analysis lab is essential for safely examining and understanding malicious software. By using virtual machines, analysts can create an isolated environment where malware can be executed without risking the host system or network.
In this guide, we walked through the step-by-step process of setting up a malware analysis lab, from choosing a hypervisor to configuring network settings, security measures, and essential tools. Key takeaways include:
By following these guidelines, you’ll have a secure, well-equipped malware analysis environment, allowing you to safely examine malicious software and better understand its behaviour.